K8s and Openfire
April 8, 2020
Openfire is a popular choice to implement instant messaging through XMPP.
Thanks to the DevOps cultural shift widely adopted in modern cloud-native software engineering, infrastructure as code is paramount.
Below, I am describing the steps to create a local minikube cluster with instant messaging capabilities via openfire.
Running Minikube #
- very first time
- follow the installation macos
- please make sure that default vm is docker because you want to download images without having to switch docker registries locally:
minikube config set driver docker
- start minikube
minikube start - start minikube dashboard
start the dashboard in a separate terminal window because the process should keep running
minikube dashboard - create cluster
- create openfire.yaml with the following content
apiVersion: v1 kind: Service metadata: name: openfire-service spec: type: NodePort selector: app: openfire ports: - protocol: TCP port: 9090 targetPort: 9090 nodePort: 31090 name: http - protocol: TCP port: 5222 targetPort: 5222 nodePort: 31222 name: name2 - protocol: TCP port: 7777 targetPort: 7777 nodePort: 31777 name: name3 --- apiVersion: networking.k8s.io/v1beta1 # for versions before 1.14 use extensions/v1beta1 kind: Ingress metadata: name: openfire-ingress annotations: nginx.ingress.kubernetes.io/rewrite-target: / spec: backend: serviceName: openfire-service servicePort: 9090 rules: - host: openfire - http: paths: - path: / backend: serviceName: openfire-service servicePort: 9090 --- apiVersion: apps/v1 kind: Deployment metadata: name: openfire-deployment labels: app: openfire spec: replicas: 1 selector: matchLabels: app: openfire template: metadata: labels: app: openfire spec: containers: - name: openfire image: sameersbn/openfire:3.10.3-19 ports: - containerPort: 9090 name: http - containerPort: 5222 name: name2 - containerPort: 7777 name: name3 - then apply using kubectl
kubectl apply -f openfire.yaml
- create openfire.yaml with the following content
- expose openfire locally
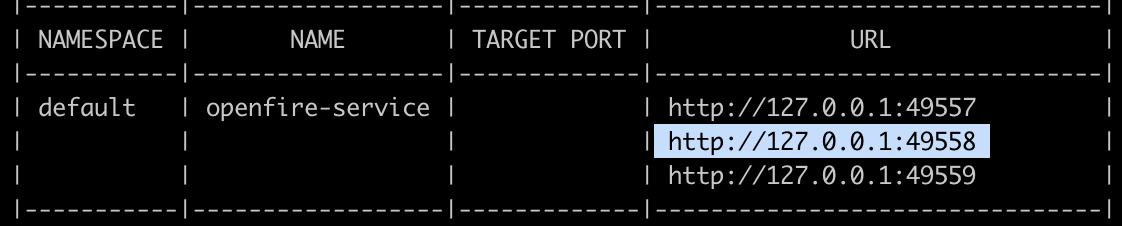
- List localurls usinh the command below. It will produce a table including the localendpoint that will proxy requests to the openfire-service ordered as 9090, 5222, and 7777
minikube service openfire-service --url
- List localurls usinh the command below. It will produce a table including the localendpoint that will proxy requests to the openfire-service ordered as 9090, 5222, and 7777
configure and testing local openfire #
-
configure admin
- use
minikube service openfire-deployment --urlto expose the localhost ports. - using the first url provided through the command above, open the admin console and configure openfire using the embedded database option (the external database configuration will be covered in fanother post).
- use
-
testing
- testing can be done using spark; make sure your client points to the local openfire exposed port, second in order, through minikube.
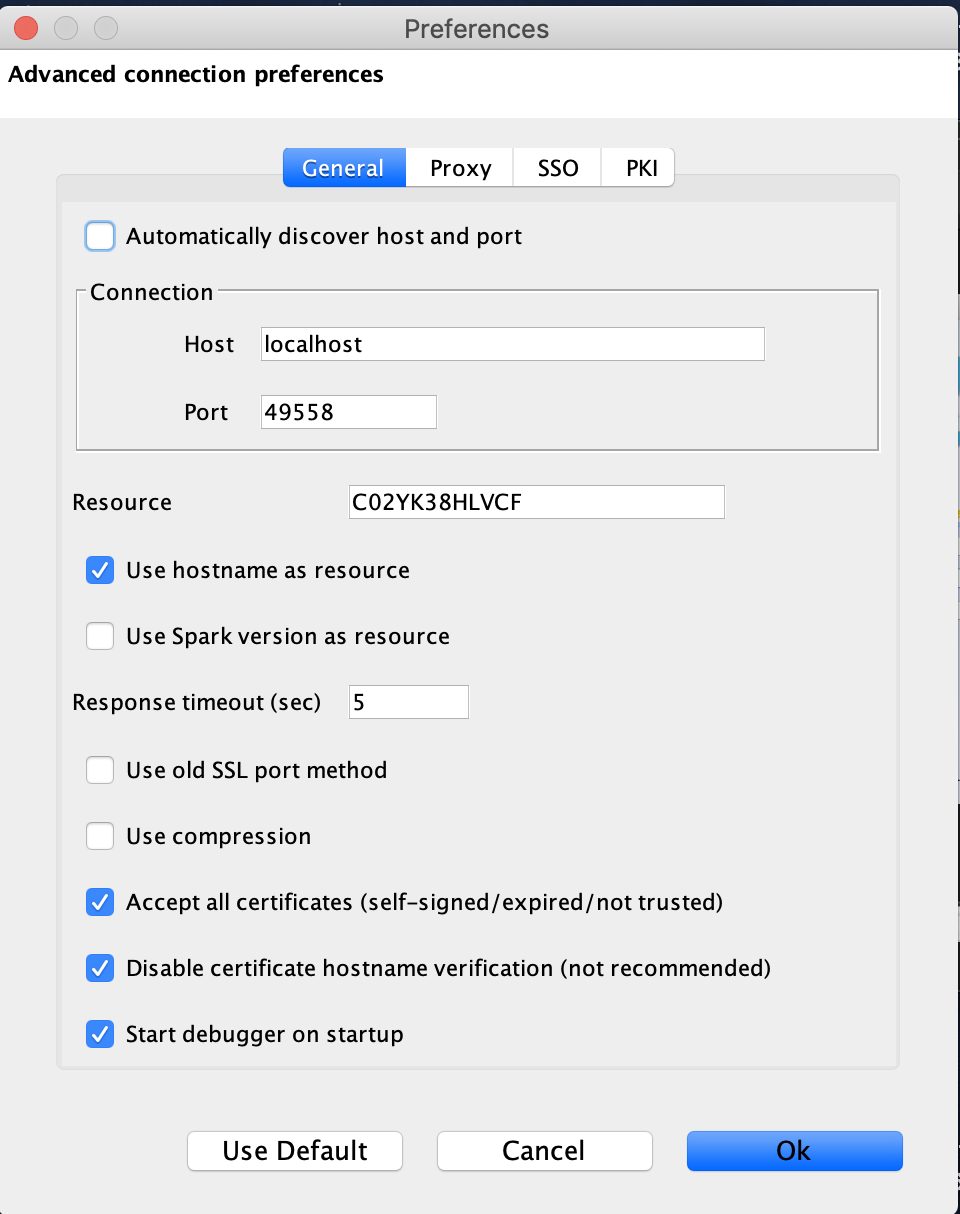
- testing can be done using spark; make sure your client points to the local openfire exposed port, second in order, through minikube.
Running in Production Mode #
The real cluster, will require ingress and egress configurations. Those can be achieve with the following instructions.